Since priint:comet 4.3
The Plugin "Tests" provides the "Tests" panel.
The plugin is optional.
Comet tests are intended to ensure that possible deviations or errors can be detected quickly in the event of a release or version change of the priint:comet plugins or the Illustrator® used. The more tests you have defined, the more certain you can be that everything will still work as before after a software update.
Comet tests are defined and executed via the Tests palette.
There are two different types of tests: document tests and assert tests.
Each document test performs the following four steps (a more detailed description can be found here) :
The validity of the proofs must be checked manually. More here.
Since document tests are based on image comparisons of proof and actual results, document tests can only test what leaves visible traces. For example, to check the number of generated files in a test, this number has to be made visible, e.g. by an inserted text in the document. More about test strategies can be found here.
Make sure that your tests are executed in a stable, unmodified test environment! Test results essentially depend on the test environment not being changed.
The test environment includes everything that has an influence on the appearance of the result, i.e. fonts, images, templates, placeholders, database contents, etc..For assert tests, the procedure is much simpler because they do not require an Illustrator® document. With assert tests, a Script is executed in which the call to the test::assert (cScript) function determines whether the test has run successfully or not. In this way, you can define yourself the criteria under which a test succeeds or fails.
Please note: failing to call these functions is considered an error aswell.
All tests can use different data sources. However, documents and actions of tests must be local (and are not obtained from the external data source).
The test definition is stored in the comet_test_suites.xml file of the user prefs:
Comet tests can also be stored in and loaded from other files. To do this, use the button ![]() at the bottom right of the Tests panel. The current path of the test file is displayed to the left of this button. Once set, it is retained when Illustrator® is restarted.
at the bottom right of the Tests panel. The current path of the test file is displayed to the left of this button. Once set, it is retained when Illustrator® is restarted.
Tests can be sorted into treeviews of any depth. Here is an example of an XML file in use:
<comet_tests>

				 <structure_version>2</structure_version>

				 <domain>

				  <id>2</id>

				  <name>Base Functions</name>

				  <description/>

				  <children>

				   <domain>

				    <id>3</id>

				    <name>Create Frame</name>

				    <description/>

				    <children>

				     <test>

				      <type>kDocument</type>

				      <id>4</id>

				      <name>cScript</name>

				      <connection></connection>

				      <file>$DOCUMENTS/CometTests/Base Functions/Create Frame/createFrame_cscript.ai</file>

				      <prescript></prescript>

				      <action>$DOCUMENTS/CometTests/Base Functions/Create Frame/createFrame.cpp</action>

				      <postscript></postscript>

				      <simulateoverprint>0</simulateoverprint>

				      <description/>

				     </test>

				   </domain>

				   /children>

				 </domain>

				</comet_tests>
The maintenance of the test descriptions is done completely via the Tests panel.
The individual fields have the following meaning:
Paths may start with the usual $prefixes for file paths. Test environments with such defined ones can easily be passed between different users and it is certainly a good idea to store test documents at such centrally defined paths. The conversion of the paths is done automatically by the priint:comet plugins. So, when editing a test (![]() or
or ![]() ), if you use the path
), if you use the path
/Users/your_name/Documents/comettests/scripts/aaa.cpp
the following path is automatically saved in the test:
$DOCUMENTS/comettests/scripts/aaa.cpp
Additionally, the keyword $DEFINITIONFOLDER is defined and replaced by the path of the current test definition file. Furthermore, the respective parent folder can be reached with ../ at any position in the path. So if the file with the test definitions is e.g. in the folder C:/Users/leo/AppData/Local/werkii, with $DEFINITIONFOLDER/../aaa.ai the file C:/Users/leo/AppData/Local/aaa.ai is addressed - starting from the folder ...Local/werkii one folder up and then further.
Please note that test definitions are defined independently of data connections. Connection-specific aliases can therefore not be supported when defining test.
Data connections are defined in the connections.xml file. The file has exactly the same format as the connections.xml of Illustrator®, InDesign®, InDesign® Server and comet_pdf. The file must also be located in your user prefs:
<connections>

				 <connection>

				  <id>1</id>

				  <name>demo</name>

				  <type>odbc_utf8</type>

				  <server>demo</server>

				  <user>demo</user>

				  <password>****</password>

				  <db>comet_config</db>

				  <lang></lang>

				  <client></client>

				  <passcredentials></passcredentials>

				 </connection>

				</connections>
In the test description, a data connection can be referred to in the <connection> element. If the element is not empty, the desired data connection is established before processing. After the test, the data connection is disconnected.
Every document test requires its own Illustrator® document. The document is specified in the <file> field in the test description and can be located anywhere in the local network. Incomplete paths are resolved relative to the user directory.
After execution, an image is shot of each artboard of the document. The images are stored in subfolders "next to" the Illustrator® file (see Illustrator® Versions). The artboard number is appended to each name. Test documents also get the extension COMET_TEST. The document is then closed without being saved.
Illustrator® always opens documents of older versions as new, unsaved documents without file path. Tests that require the file path (e.g. for test images) will not work in this case.
Documents that do not have a file path after opening are therefore saved to the original file after opening. A copy of the original file is made beforehand with the name extension _TMP_. At the end of testing, the old file is restored and the _TMP_ file is deleted.
If the test document is to remain open after the test, this procedure will not work because the modified original file remains in use and therefore cannot be overwritten again.
Therefore, if the test document is to remain open after the test, no intermediate version will be created in the current Illustrator® version and tests that access the document path will fail.
Each test can execute up to three actions:
All scripts are defined via file paths. Pre- and post scripts may be empty, the test itself may not. The scripts may be located anywhere in the local network (but not in a database!). Incomplete paths are resolved relative to the user directory.
The pre script is already executed before the actual Illustrator® document is opened (document test only) - this way you can e.g. create the actual document only in the preparation script.
The test script works on the document specified in the test. Please note that the document must not be saved in the action script, because tests should always be started from the same starting point.
The post script is executed after the test document is closed (document test only).
A distinction is made between two types of scripts. The script type is determined by the file extension:
| Type | Extension | Description |
| cScript | c, cp, cpp, crpt |
Valid cScript. Script document is the current test document. cScripts are not encrypted. |
| Python | py |
Valid Python script. Script document is the current test document. Python scripts are not encrypted. |

In the panel Tests there are several tools:
| Icon | Description |
Execute testExecute all tests marked with an eye. If no eye is set, all tests will be executed - because this may be a lot of tests, you will be asked beforehand if you really want to execute all tests. Before each test all old images of this test are deleted. After the test the status field of the test is set. Errors are displayed in the second column of the list. If you keep the ALT key pressed, the first executed test remains open after its execution. This gives you the possibility to check the test result. Always close test documents without saving them! If you hold down the Ctrl/CMD key, the test results are deleted. |
|
Create proof dataNew proof data is generated for all tests marked with an eye (i.e. new spread previews are created). If no eye is set, proof data is generated for all tests. Old proof and test data for this test are deleted beforehand. If only one test is selected, the generated proof images are opened in a graphics program. To trigger this action, the ALT key must be pressed. If the Ctrl/CMD key is held down, the proof data is deleted. |
|
Create a new test or domainAll the information required for a test is requested in a dialog. Please also note the information on the storage path of the documents and scripts used. If you hold down the Shift key, a new test domain is created. If there is no connection to a test definition file, you will be prompted to select the location for a new file. This will then be created automatically and a connection established. |
|
Edit testModify the data of an existing test. Allows editing the selected existing test or test domain in a dialog. Please also refer to the notes on the storage path of the documents and scripts used. Hold down the ALT key to open the folder containing the test document (and images) of the test. |
|
Delete testDeletes the selected test/test domain. For this action several modifiers are available which are activated via keys: Alt: Deletes the test from the list and the XML definition. Strg/Cmd: Deletes the associated proof data and test results. Shift: Deletes the associated Illustrator® file. These modifiers can be combined in any way. For example, a combination of Ctrl+Alt+Shift permanently deletes the test and its associated data. If a test domain is selected, the action is performed for all children! |
|
ReloadReloads the XML definition and all tests/domains. |
|
Connect to definition fileSwitches the current XML test definition file being worked on. There are several modifiers available for this action which are activated via keys: Alt: Disconnect. Clears the palette and disconnects from a definition file. Shift: Attempts to connect to the default definition file (comet_test_suites.xml in the user directory). |
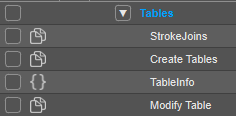
Tests are represented as nodes in a treeview. Each node represents either a test or a test domain. A test domain represents a container for any number of tests and subdomains. Test domains can be recognized by their blue marked name.
Test domains are not tests and are not executed, even if they are marked with an eye. Tests themselves can be recognized by a name marked in white. To the left of the name of a node are various status symbols:
| Icon | Description |
|
Shows whether a test is marked. If an eye is visible, this test will be included when running the tests or generating the proof data. Domain entries get an eye if at least one of the contained tests has an eye. The eye is a button and can be activated or deactivated with a mouse click. If you mark a test domain with an eye, all child nodes are also activated or deactivated. |
|
|
Indicates the type of test (Pages: Document Test, Curly brackets: Assert Test) |
|
|
If this icon appears, the test has been performed successfully or the proof data has been generated successfully. If this icon appears for a test domain, all child tests have been performed successfully. |
|
|
If this icon appears, the test is being performed. If this icon appears for a test domain, a child test is currently being performed. |
|
|
If this symbol appears, there were errors during the execution of a test or the generation of the proof data. If this symbol appears for a test domain, there were errors with at least one of the child nodes. |
When running the tests, each test goes through the following steps. Oblique steps are optional and are executed only if the test is configured accordingly::
Proof data and test results of document tests are stored depending on the operating system and Illustrator® version. For this purpose, the data is stored in subfolders next to the Illustrator® file of the corresponding test. These subfolders are named as follows:
(PROOF|TEST)_$OS;/(PROOF|TEST)_ILLU_$ILLUVERSION;
The variable $OS; is replaced by the operating system: "WIN" for Windows, "MAC" for Mac.
The variable $ILLUVERSION; is the actual major version number of Illustrator®, not the CC or year number. You can find this number in in Illustrator® as the first number at 'Help->&About Illustrator®'.
e.g. PROOF_ILLU_27 for proof data of Illustrator® 2023, or TEST_ILLU_24 for test data of Illustrator® 2020.
When deleting proof or test data of Comet Tests, only the data for the current Illustrator® version is deleted!
Will these changes cause my existing proof data to no longer be found?
When comparing the test data with the proof data, there is a fallback method:
First, an attempt is made to find proof data for the current Illustrator® version. If this is not successful, the system searches for proof data from older Illustrator® versions until it finds any, or until there are no longer any corresponding proof data folders. In the latter case, as a last fallback, an attempt is made to search for proof data next to the Illustrator® file (legacy location).
If no proof data of the current Illustrator® version is found and data of an older version is used instead, a warning is written to the log file.
If successful, the test will be marked with a green icon :

Folder entries of the Comet tests get this icon only when all subentries have a successfully executed.
Erroneous tests are marked with a red icon. The error status is passed up through all folder entries:

A short description of the cause of the error appears next to the test name. In addition, the errors are included in the tooltip of the test in the list - hold the mouse still for a moment over the test name for this.
If the Comet option "Write logfile" is activated, a separate test logfile is written at the same location as the Comet logfile.
If only a single document test was executed and the test failed because the proof and the actual result are different, the first two different images are displayed in a suitable graphics program.
A number of script commands are available to automate the execution of tests:
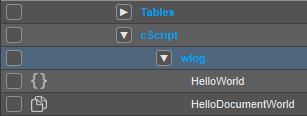
To consider the tests HelloWorld & HelloDocumentWorld, use the following pat:
"cScript/wlog"
In the following we want to describe some strategies how tests can look like.
We often created tests in documents with artboards placed side by side: on the left artboard are the test frames, on the right artboard are the results.
This actually seems unnecessary because the CometTest in turn takes before and after images again. However, in the case of failed tests, you then have an easier time determining at which point the test failed.
This way you can have placeholders checked in a fairly simple way:
Use the following script to load all placeholders of a document. Applied to the placeholder created above, the script causes the placeholder of the left page to be loaded and the placeholder of the right page to remain unchanged - both texts or images should be the same after the test. It is best to place the script in a central folder of your test folder (which you have long since created).
//
//
// Description : Load all place holders of all frames of the current front document
// Author : Paul Seidel
// Date : 26.Jan 2017
// Copyright (c) : 2017 WERK II, Paul Seidel
//
//**
#include "internal/types.h"
#include "internal/text.h"
int main ()
{
ItemList pl = itemlist::allframes ();
ItemRef fr = item::alloc ();
int i;
for (i = 0; i< itemlist::length (pl); i++)
{
itemlist::get (pl, fr, i);
placeholder::load (fr);
}
return 0;
}
Layout rules might also be a good tool for testing.
Jetzt benötigen Sie noch ein Skript, das alle Gestaltungsregeln nach Geomtrieänderungen der Rahmen des Dokumentes ausführt. Das Skript legen Sie am besten in einem zentralen Ordner Ihres Testordners (den sie sich inzwischen längst angelegt) ab.
#!py

import comet

def main():
	items = comet.gDocument.getPageItems()
	item: comet.CFrame

	for item in items:
		try:
			item.applyLayoutRules(comet.kLayoutRuleSituationGeometryChange)
		except:
			pass

	return 0
As mentioned at the beginning, document tests are based on image comparisons. Therefore, only what can be made visible can be tested. However, if you want to test whether, for example, a certain file is created, Comet tests are not useful at first. In this case you must try to test the desired information via Script and then write the result as text in the test document.
A test is to check whether a document can be saved. The following could be imagined: The test script saves the test document. Then you test whether a file is actually located at your_path and write the test result in a text frame:
if (!file::exists (your_path))
{
	strcpy (txt, "Test failed : ")
	strcat (txt, your_path);
}
else
{
	file::remove (your_path);
	strcpy (txt, "Test okay");
}

frame::replace (gFrame, txt);
When you are sure that your test works properly, create the proof for the test. To do this, use the button ![]() of the Tests panel. To create the proof of a test you must hold the ALT key.
of the Tests panel. To create the proof of a test you must hold the ALT key.
You might find the following functionalities helpful when reviewing your test: