
Defining a Layout area for repeating elements.
The placement of repeating elements can be limited to the area defined by a layout frame by using the build mode area.
When the Build action of a frame placeholder with type "area" is executed, that frame is used as the layout frame, and all other placement parameters in the format string are ignored. Each layout frame defines these parameters itself - you can configure them in the "Area Building" panel.
Chaining frames is also an option - this allows distributing repeating elements among multiple layout frames.
In this example, repeating elements were placed around the text frame in a clockwise fashion. Previously, this required complex cScript programming.
In the screenshot, multiple layout frames were chained (green background) surrounding the product text (magenta background). They were filled with repeating elements, beginning with the right hand frame and continuing clockwise.
The settings controlling the area build of repeating elements are configured in the area build panel. The panel contents depend on the selection in the document: if the selected frame is a layout frame or part of a repeating element, information pertaining to the chain is displayed in the left and right portions of the panel. The central portion is used to configure the layout frame, and therefore is only active when such a frame is selected. If none or multiple frames are selected, the controls in the panel are deactivated.
The panel has three areas: The list of layout frames (chains), the layout frame settings and the element products.
If a chain is filled with repeating elements, the paste is canceled. Extra items are ignored and the following message is written to the logfile:
# Build cancelled, some frames are leaving the page or their layout area.
If the document shows the placeholders (context menu Placeholders -> Show), the last frame of the chain will show a red background indicating how many elements could no longer be inserted into the document:

The placeholder will also be shown in the ToDos panel with appropriate information.
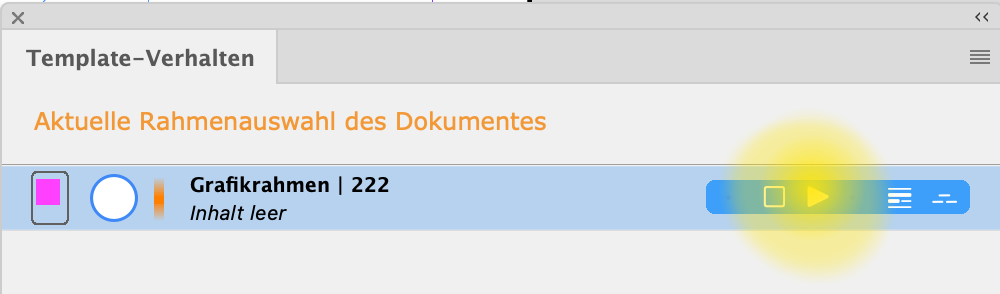
When assembling the product, it may be necessary that the area size is variable. This is particularly useful if the number of elements to be placed is not known. To do this, set the continuation triangle of the frame using the Template Behavior panel. To set the triangle, the frame must be temporarily converted into a text frame. Please make sure that you only place the continuation triangle in frames that actually have enough space at the bottom!
If the continuation triangle is set, the frame is enlarged to the maximum height given by the page element before loading the repeating elements and reduced in size after loading so that it exactly encloses the elements. If no elements are loaded, the frame is given the minimum possible height of 4 pt.
The set triangle does not mean that repeating elements can be continued on subsequent pages or even that subsequent pages are automatically created! Even with the triangle set, repeating elements can only be placed on a maximum of one document page. See also here.
In releases prior to R14610, the order of the area frames was controlled by the identifiers and sequence numbers of the template frames: All frames using the same identifier as the frame triggering the build form the area filled with elements. The order they were filled in was then controlled with the sequence numbers (identifier and sequence are configured in the Template Behaviour panel.) This description no longer applies in R14610 onwards!
It is possible to link multiple frames. Placement of repeating elements then continues with the next frame in the chain, once the current frame is full. The layout behaviour for each frame in the chain may be configured individually.
Frames are linked in the area build panel, too. Here, frames can be added to or removed from the chain, and the fill order can be configured as well.
In the left hand section of the panel, the layout frames in the chain of the frame currently selected in the document view are listed. This list is deactivated if multiple frames are selected.
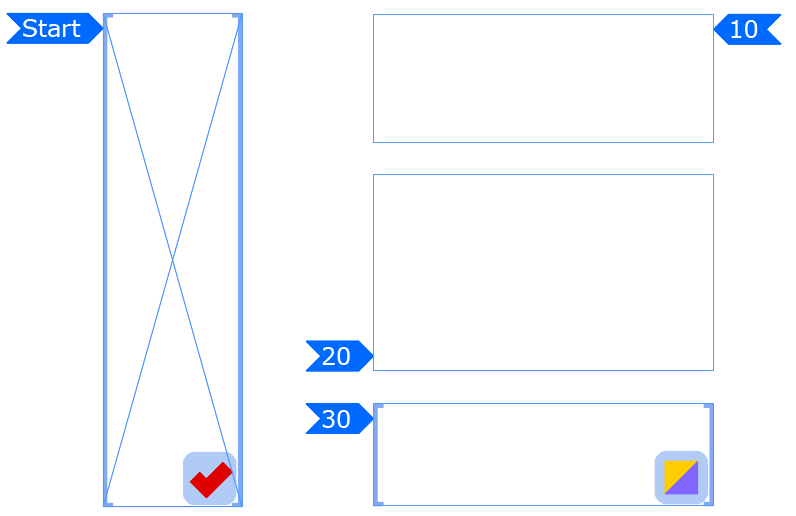
1. Positional preview of the frame
2. Frame number (UID)
3. Click here to select the frame in the document view
If the document shows the placeholders (context menu Placeholders -> Show), the order of the frames is highlighted in blue on the frame. The marker is always located at the corner of the frame where the first element will be inserted:
There are multiple tools for editing frame chains available within the panel:
| Icon | Description |
|
Precondition The following conditions must be met for the chain frames:
Add a frame to the chain: When this button is clicked, all frames then selected individually in the document view are added to the chain. This also removes the frame from all other chains. Chains can only be created within a single comet group. This mode is deactivated when the panel is closed, or multiple frames are selected in the document view. Otherwise, you can manually disable the mode by clicking the button again. |
|
|
Remove frame from chain: Removes the frame selected in the list from the current chain. The first frame in the list (the one with the repeating element placeholder) cannot be removed. |
|
|
Move frame upwards: Moves the frame selected in the list upwards by one position. The first frame in the list (the one with the repeating element placeholder) cannot be moved. |
|
|
Move frame downwards: Moves the fraem selected in the list downwards by one position. The first frame in the list (the one with the repeating element placeholder) cannot be moved. |
As of now, repeating elements can be laid out in two different modes - row-by-row and column-by-column.
| Setting | Description | Preview |
| Row-by-row | The repeated elements are placed in the frame horizontally. If an element does not fit to the right/left of the last element, a new row is started. |  |
| Column-by-column | The repeated elements are placed in the frame vertically. If an element does not fit below/above the last element, a new column is started. |  |
The settings of the build directions determine the starting point of the build of repeated elements, and the order they are placed in.
In row-major builds, the horizontal direction controls the placement of individual elements, while the vertical direction determines the placement of rows.
In column-major builds, the horizontal direction controls the placement of columns, while the horizontal direction determines the placement of individual elements therein.
The location of the first element therefore depends on the settings of the two directions:
| Horizontal Direction | Vertical Direction | Starting point |
| Left to Right | Top to Bottom | Top Left |
| Right to Left | Top to Bottom | Top Right |
| Left to Right | Bottom to Top | Bottom Left |
| Right to Left | Bottom to Top | Bottom Rigth |
Examples:
| Setting | Preview |
| Row-by-row, left to right, top to bottom |  |
| Row-by-row, right to left, bottom to top |  |
| Column-by-column, left to right, bottom to top |  |
| Column-by-column, right to left, top to bottom |  |
Please note that the starting point is not necessarily equivalent to the actual placement of the element. The latter is also affected by the alignment of the elements and rows/columns.
The internal alignment of rows and columns determines the alignment of the contained elements to the row or column. For example, if elements of varying height are placed in row-by-row fashion, they can be aligned to the upper or lower edge of the row, or its mid-line.
In row-by-row builds, these parameters control the individual elements' vertical alignment relative to the row, in column-by-column builds they control the horizontal alignment relative to the column.
The internal alignment can be set individually for the first and last row/column, while all other rows/columns share one setting.
| Setting | Description | Preview |
| Row-by-row placement | ||
| Top | Align the upper edges of elements with the upper edge of the row |  |
| Center | Align the vertical center of elements with the vertical center of the row |  |
| Bottom | Align the bottom edge of elements with the bottom edge of the row |  |
| Setting | Description | Preview |
| Column-by-column placement | ||
| Left | Align the left edge of elements with the left edge of the column |  |
| Center | Align the horizontal center of elements with the horizontal center of the column |  |
| Right | Align the right edge of elements with the right edge of the column |  |
The alignment with the frame controls the placement of repeated elements along the edges of the frame. In row-by-row builds, this parameter controls the horizontal position of the elements within the frame, in column-by-column builds the vertical position.
| Setting | Description | Preview |
| Row-by-row placement | ||
| Left | The row of elements is aligned with the left edge of the frame |  |
| Center | The horizontal center of the rows is aligned with the horizontal center of the frame |  |
| Right | The row of elements is aligned with the right edge of the frame |  |
| Horizontal Justify | The elements in the row are spaced evenly to fill the width of the frame. With this setting active, the minimum x distance is applied when spacing the elements. |  |
| Setting | Description | Preview |
| Row-by-row placement | ||
| Top | The column of elements is aligned with the upper edge of the frame |  |
| Center | The vertical center of the column is aligned with the vertical center of the frame |  |
| Bottom | The column of elements is aligned with the lower edge of the frame |  |
| Vertical Justify | The elements in the column are spaced evenly to fill the full height of the frame. with this setting active, the minimum y distance is applied when spacing the elements. |  |
The distribution in frame controls the placement of the fully formatted rows/columns, treating them as one big element. In row-by-row builds, these parameters control the vertical placement of rows within the frame; in column-by-column builds, they control the horizontal placement of columns.
| Setting | Description | Preview |
| Row-by-row placement | ||
| Top | The upper edge of the top row is aligned with the upper edge of the frame. |  |
| Center | The vertical center of the bounding box of all rows is aligned with the vertical center of the frame. |  |
| Bottom | The lower edge of the bottom row is aligned with the lower edge of the frame. |  |
| Vertical Justify | The rows are spaced evenly to fill the full height of the frame. With this setting active, the minimum y distance is applied when spacing the rows. |  |
| Setting | Description | Preview |
| Column-by-column placement | ||
| Left | The left edge of the first column is aligned with the left edge of the frame. |  |
| Center | The horizontal center of the bounding box of all columns is aligned with the horizontal center of the frame. |  |
| Right | The right edge of the last column is aligned with the right edge of the frame. |  |
| Horizontal Justify | The columns are evenly spaced to fill the full width of the frame. With this setting active, the minimum x distance is applied when spacing the columns. |  |
The minimum distance settings control the distance between elements and rows/columns.
Row-by-row placement:
Column-by-column placement:
The build-up area can grow with the number of repeating elements until the bottom of the page. The width of the construction area remains unchanged. To do this, open the panel Temlpate Behavior and, while holding down the CMD button, click in the third column of the frame settings until the filled triangle appears.
Please note: An automatic continuation of the construction area on the following document pages is not possible.
The build area can grow with the number of repeating elements up to the bottom of the page. The width of the build area remains unchanged. To do this, open the Template Behavior panel and click in the third column of the frame settings while holding down the CMD key until the filled triangle appears.
Please note: It is not possible to automatically continue the layout on the following document pages.
Now you can change the height of the frame so that the template does not trigger a page change even with a few or very small repeating elements.
There are multiple tools at the bottom of this section:
| Icon | Description |
|
Reorganize: Reorganized the repeating elements existing in the document of the current frame chain, with respect to the settings in the panel. Elements that no longer fit into the document or the layout frames are thereby removed from the document. |
|
|
Automatic Reorganization: If this mode is enabled (the icon is red), each change in the panel automatically causes a reorganization of repeating elements in the current frame chain. |
The right portion of the panel deals with repeating elements that are already built. Elements that already exist in the document are listed here. You can reorder them or remove them here.
Changes made to this list are applied during the next reorganization.
1. Preview of the element's frames
2. Number of frames
3. Click here to select the corresponding frame in the document view
You can change the order of the elements via drag-and-drop.
There are a number of tools for editing this list at the bottom of this section:
| Icon | Description |
|
Remove frames: Removes all frames of the element currently selected in the list. The frames are deleted from the document. |
|
|
Move frame upwards: Moves the frame currently selected in the list upwards by one position. |
|
|
Move frame downwards: Moves the frame currently selected in the list downwards by one position. |
Putting together the products to be built in a repeating element can also be done via a cScript. Further information can be found here.
A number of cScript functions are available for configuration of layout frames. These functions allow configuring layout frames in the same functionality as the panel.
While you can set the layout settings of a frame from cScript, you should not do that while building repeating elements.
Changing the layout configuration of a frame that is currently involved in a build of repeating elements can lead to unforeseeable results!
The following functions are available for this purpose:
Sometimes it may be desirable to place the elements of a product irregularly and/or overlapping. Here is a screenshot of two flyers with differently distributed elements:
To do this, you must know the relative XY positions of the individual elements and pass them on in the Format String of the Repeating Elements. The following information is required for this:
The example xmldata-multiframe contains the two repeating elements shown in the screenshot above.
The placeholder has the build script:
#pragma plain "$PRODUCTS" select ...id, id, 0, '', 3, 1, "type=stagger;pin=lt;link=(0);offset= (0.0, 0.0);post=autoload;" || relpos node products.product where id =relpos is defined as an XML attribute of every 'products' in $PRODUCTS", e.g. asnode articles.article
relpos="pin=lt + (110, 0)"Template 1, the n-times repeated element itself, only contains an image frame. The image name corresponds to the 'product' name defined in the XML attribute name of every entry. $PRODUCTS" is defined as a reference to the file xmldata-multiframe/products.xml using the panel Window -> Comet -> Settings.