Basic functionality of priint:comet plugins and implementation of the cscript scripting language
CometXML is the standard variant of the plugins for InDesign® on the desktop.
The XML suffix does not stand for a supported data connection, but support for scripts within the XML structure of the document.
InDesign® can link frames and text with XML elements. When you select an entry in the popup menu in the Comet pane, all XML elements linked to the selected frames are searched for child elements with the selected name. When such an element is found, its content is fetched and executed as a cScript.
Hint: If you just want to test a script that you have as a file, here is a very simple way.
As a step-by-step instruction :
CScripts are compiled at run time and executed in memory. By default, 128 kB are allocated for this. Big scripts especially, as well as large static variables (such as char str [1000000]) may exceed this easily. You will be met with a message of the type :
In this case you should increase the the buffer size. When applied, the change applies to all scripts executed afterwards and is restart resistant.
You can set the buffer size from within a script with prefs::set_script_buffer. Naturally, changes then only apply to scripts executed later. Therefore, you should make this change within the Login Script.
DEPRECATED
Adobe expressly prohibits the use of InDesign® (desktop) in any batch mode. We continue to deploy the Comet++ plug-in for historical reasons, and you can continue to install and use the plug-in. However, the use of the batch process is prohibited and we hope you will understand that we no longer provide any support for this.
Comet++ realizes database backed batch processing of documents. Documents in the batch are defined in the ScheduledJobs table. For each document, an action implemented in cScript is defined, which processes the document. You can get more information on batch processing with server plugins at support@priint.com.
For each document in the batch, the following steps are executed:
Batch processing can also be used in mixed networks of both Macs and Windows PCs. The database attribute dmn_ScheduledJobs.Program specifies which programs may process a job. You can specify the following values:
| Program | Description |
| InDesign.comet | Processing under MacOSX |
| InDesign.Windows.comet | Processing under Windows |
Reader version of the Comet plugin. This plugin does not have its own pane and has no menues.
Quick access for your most used Panel Actions and local scripts.The pane is contained in both the CometXML and Comet++ plugins.
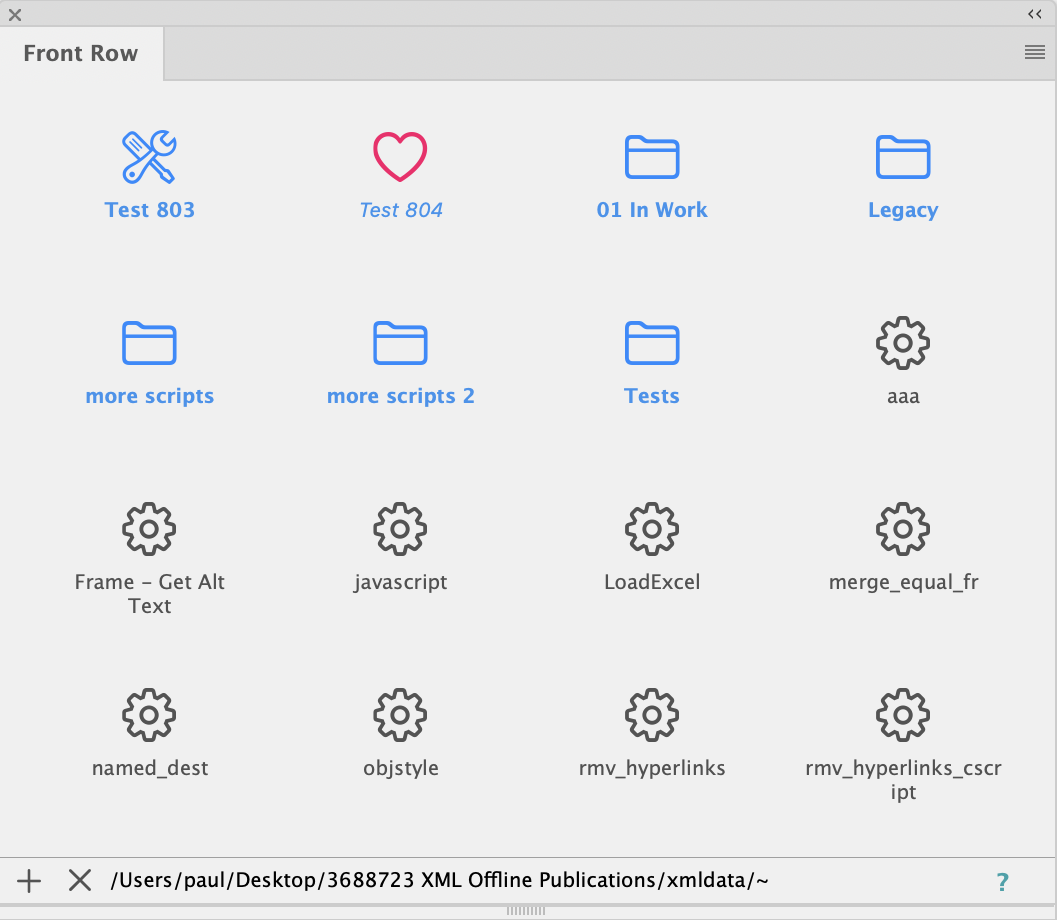
With a definition in the inputdocumentation attribute of the action, panel actions can be included as global buttons in the Front Row panel. Global buttons are always placed first in the panel and labeled with blue bold font. The buttons can be seen by all users who have connected to the data pool. Global buttons cannot be removed.
The inputdocumentation consists of up to three entries separated by ##:
Buttonname##IconID##Helptext
The first part of the definition specifies the name of the button. If the specification is empty, the name of the panel action is used. If the panel action name consists of a path, only the name part is used.
The name is automatically translated into the language of the InDesign® used using the currently available translations.
Please note that the names of the panel actions are often too long for the button labels - so a separate name definition for buttons is usually useful.
Create the panel action as a button "My Button" with the icon ![]() and without help text.
and without help text.
My Button
The second part of the inputdocumentation defines the icon of the button. A list of possible icons can be found here. If the IconID is missing, the icon 408 ![]() is used as default. If the icon does not exist, the button will be created without an icon.
is used as default. If the icon does not exist, the button will be created without an icon.
Creating the panel action as a "My Button" button with icon 2018 of the Product Pool and without help text.
My Button##32018
If a panel action named A^B^My Button is defined, the following definition creates the My Button button with icon 130 of the Settings panel.
##50130
It is good style to add a short help text to the buttons. The help text is defined in the third part of the inputdocumentation.
The help text is automatically translated into the language of the InDesign® used using the currently available translations.
Create a panle action as a "My Button" button with the icon 2018 of the Product Pool and a translatable help text.
My Button##32018##kMyButton_Help
Die folgende Tabelle beschreibt alle Varianten einer inputdocumentation für ein Front Row Button:
| inputdocumentation | Description |
| Empty | No Button |
| aaa | Button aaa with icon |
aaa####Help Text | Button aaa with icon |
| aaa##30218 | Button aaa with icon 218 of panel Product Pool and no help text |
| aaa##30218##Help Text | Button aaa with icon 218 of panel Product Pool and the help text Help Text | ####Help Text | Button with the same name like the panel action, icon |
| ##30218 | Button with the same name like the panel action, icon 2018 of panel Product Pool and no help text |
| ##30218##Help Text | Button with the same name like the panel action, icon 2018 of panel Product Pool and the help text Help Text |
Even panel actions without globally defined Front Row Buttons can be shown as buttons. These buttons are only visible in the your local InDesign® and are labeled in the palette with blue italic font. Other InDesign® installations will not see these buttons. The stored buttons are provided with an identifier, which ensures that only the buttons belonging to the current data connection are shown. Please note that local buttons can only be created for defined palette actions!
Local buttons are created by clicking the +-button of the panel. You will be asked for a name and an optional help text. After the name, you can specify an icon ID, seperated from the name with #. You can find a list of valid icon IDs here. If no icon is specified, icon 408 (![]() ) will be used by default.
) will be used by default.
You can remove local buttons with the x-button of the panel.
[since v4.1.8 R28082] If a valid data connection exists, further scripts can be loaded into the panel from local files regardless of the connection. External changes to the files are applied to the panel before the script is executed - so you can edit the scripts in your favourite programme and test them immediately in InDesign®. Script files can have the extensions c, cpp, h, crpt and (since v4.2 R32685) jsx and are searched for (in this order) in the following folders:
The scripts must not be encrypted!
ALT-click the load button ![]() of the panel to reload the entries.
of the panel to reload the entries.
Sometimes you may want to test scripts that are stored 'somewhere' else. In this case, you can also place an alias to this file in the cscripts folder instead of the script file itself. Please note the following:
mklink /Users/yourname/Desktop/cscripts/abc.cpp /org_path/abc.cppOptionally : Reload the panel by ALT clicking the
The file names without extensions are used as the names of the Front Row buttons. The buttons are given the icon 408 ![]() by default. To configure the button add a C-comment with the following information at any point of your script:
by default. To configure the button add a C-comment with the following information at any point of your script:
[since v4.2 R32685] Files with the extension jsx are executed as Javascript. The following additional variables are automatically defined for these scripts:
| Variable | Description |
| gRun | See here. Text selections are not supported by the Javascript execution. |
| gDocRef1 | Current front document or 0 |
| gItemRef1 | Current frame of script execution or 0 |
Here is a very simple javascript. In the document the color field 'orange' must be defined.
function main ()
{
	if (gItemRef1 != 0)
	{
		gItemRef1.fillColor = "orange";
	}
	return 0;
}

main ();
[Since v5.0 R37360] The entries for Front Row can be explicitly enabled only for InDesign®, Illustrator®, and/or comet_pdf. Actions that are not permitted for the current application are not shown in the panel. See here for more information.
The panel was deactivated again starting with v5.0 R37400.
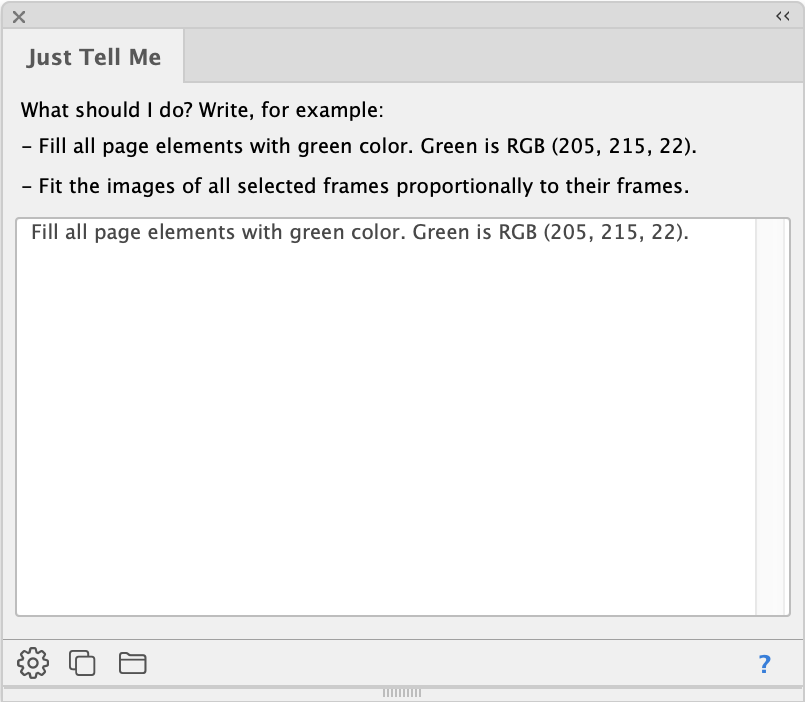
[Since v5.0 R36440] Write a request that you want InDesign® to do for you. The request can be formulated in normal human language. But the more precise your request is, the better the result will be. In the background, your request is translated into program code (ExtentScript Javascript) that InDesign® can execute. See here for more information.