
This tutorial will walk you from the creation of a template through to page building products in simple steps.
Time Required: 3-4 Hours. If you use the templates defined in the test case, and the pre-built documents in the Finish folder: 30-60 minutes. Even then, reading the document beginning with Document Products Panel may be worthwile.
Minimum Requirements:
InDesign® documents can only be opened without restrictions using the version in which they were last saved. In all other cases, the following applies:
To avoid version problems with documents, you should always make sure to work with the same version of InDesign® that everyone else involved is using. In particular, we strongly advise against using new versions of InDesign® until you have consulted with your team and everyone else involved!
For a complete build, you will need templates that have one continuation each, in addition to a left page and right page variant. The continuation templates are needed when page elements can continue their content and the inserted text is too long for that element. The process of creating a smart template is explained further below.
Your data pool has to be configured appropriately to allow creation of smart templates, you can find out more about this here. A detailed description of smart templates and continuation templates can be found here.
During page building, information required for reorganization is stored in the product frames. This only happens since Comet 3.2 R2100. All products in the document require this information. This means you need v3.2 R2100 of the Comet Plugins, at the very least.
Page building and reorganization can be used on all data connections supported by Comet. No special adjustments are required.
The data model has to be capable of supporting the following features:
Here you can find more information about the extension of the standard Comet data model.
Make sure that the following attributes/files are available. In the supplied data folder xmldata (see below), you will find the respective definitions.
Here you can find more information about the extension of the standard Comet data model.
The configuration data in SOAP is managed in XML files as well. These files have to match those in an offline XML data folder (see above).
Make sure that the following tables/attributes are available:
With the following (mySQL) statements, you can define the required tables and attributes:
alter table pageitems add continueid int (10);
update pageitems set continueid=0;
commit;
alter table pageitems add magnets int (10);
update pageitems set magnets=0;
commit;
alter table pageitems add active int (10);
update pageitems set active=3;
commit;
create table framerules
(
id int (10),
pageitemid int (10),
prerule_id int (10),
prerule_params varchar (4000),
postrule_id int (10),
postrule_params varchar (4000),
grid_id int (10),
element_id int (10),
pagerelative int (10),
intersection int (10),
distance float,
primary key (id)
);
commit;
This tutorial uses an XML data folder as its data pool. You can find a ZIP archive of this folder here. To install this as your data pool:
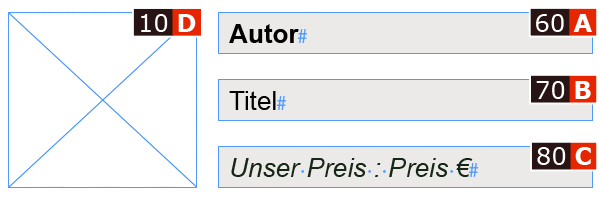
The template should contain an image with the following properties
Start by creating an image frame and personalize it as you see fit. Here, we decided on a transparent frame with a thin black border. You do not yet need to place an image in the frame at this point:

Using the Placeholder Panel (Menu Window -> Comet Admin -> Placeholder), link the frame to the placeholder Cover Image. To do so, select the image frame and click the list entry with with the name Cover Image:
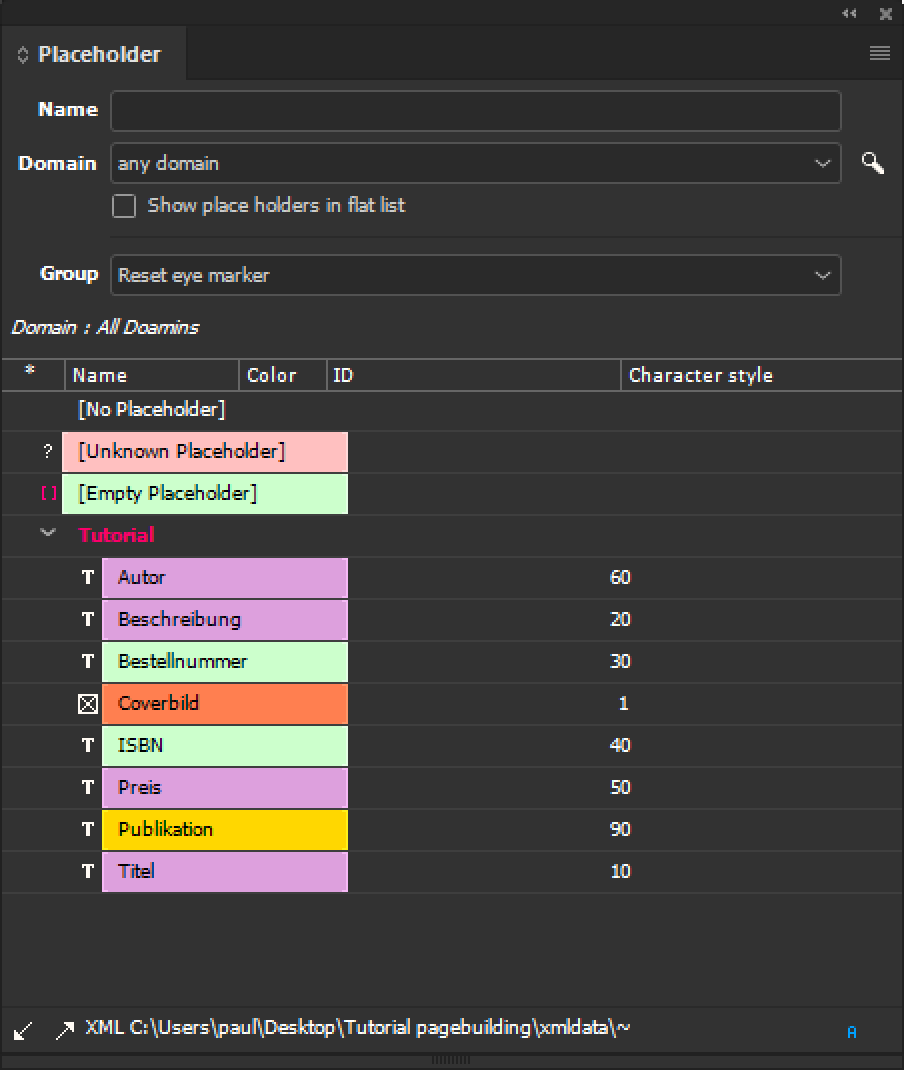
Placeholders for frames and texts differ in the tasks they have to fulfill. The plugins automatically ensure to only ever allow setting placeholders of the appropriate type. A placeholder's type is indicated in the panel by a small icon next to the placeholder's name. For image placeholders, this is a small image frame: 
The placeholder is supposed to load the image later. To allow it to do so, it contains a statement for loading it. In this example, this is the command:
"$DATAFILE"
select "$COMETDATA" || "/" || image, 5
node books.productgroup where productgroupID = <ID2>
node book where bookID = <ID>
The 5 following the image path is placement information (find out more). As you will see in the next step, you can omit this.
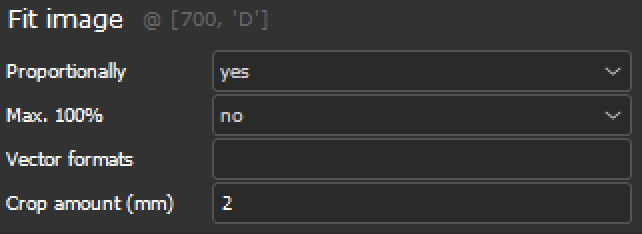
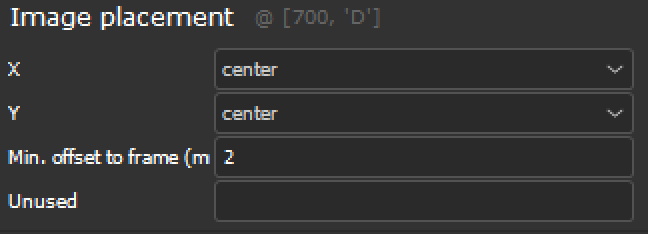
All settings concerning size and position adjustments of the image can be made in the Layout Rules panel. Select the image frame and add the rules specified below. Please take note of the following:
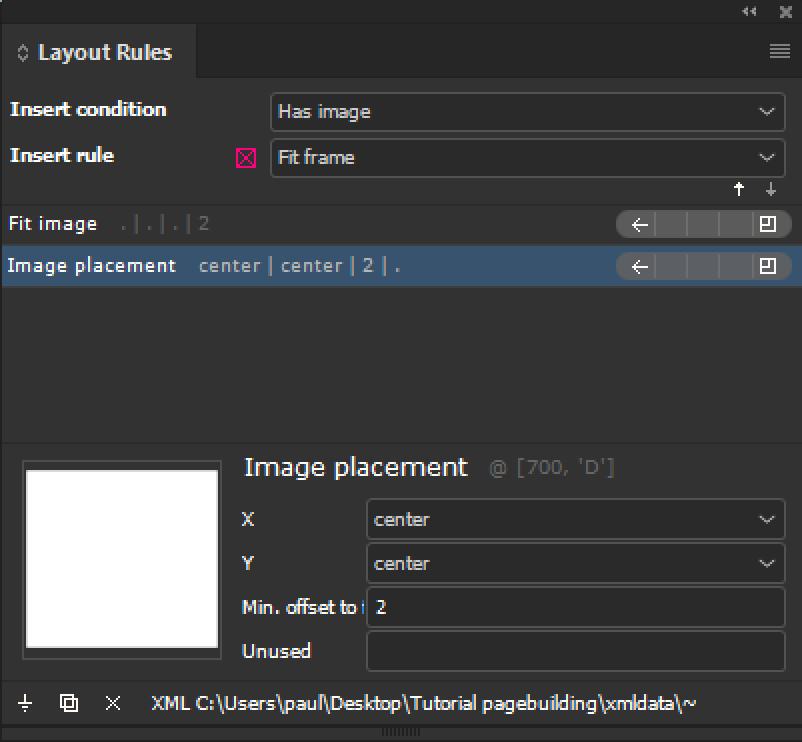
For testing purposes you can load the frame with any arbitrary image and either move or resize it:

No additional rules are required here. Should the provided standard rules not suffice at some point, you can also create your own. More on this can be found here.
The template should show three texts near the inside edge of the page, the image above should be placed near the outer edge. Creation of text placeholders is analogous to creation of image placeholders described above:
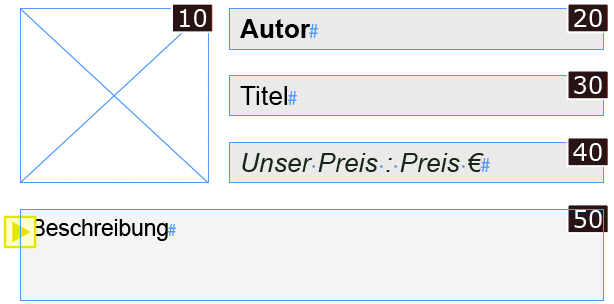
Here is a screenshot of the frames used in the example folder. Here, we linked the text Author with the placeholder Author, and so on. Of course, the placeholder text in the document is completely independent of the name:
If some text is too long, it will have some overset. To prevent this, either increase the frame size or make the text smaller. Both options are available as standard layout rules. Here we set the Author frame to use the rule Adjsut Text, and the Title frame with the rule Adjust Frame. Both rules should be executed when the placeholder is reloaded:

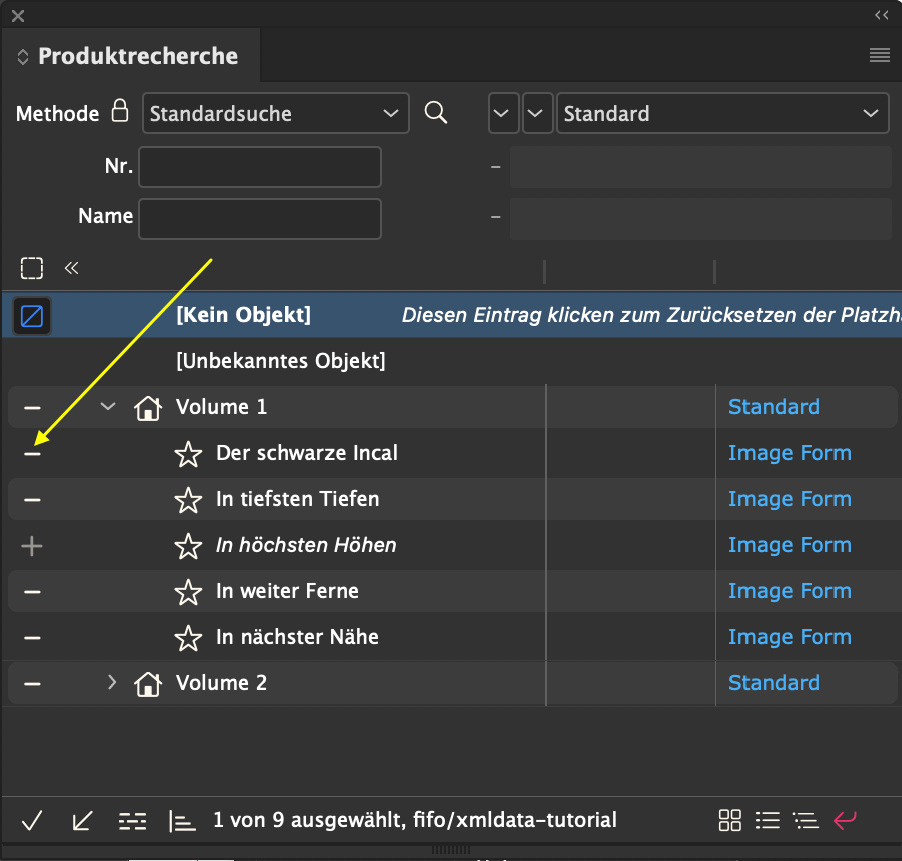
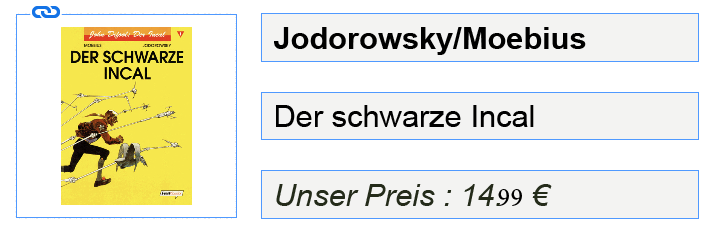
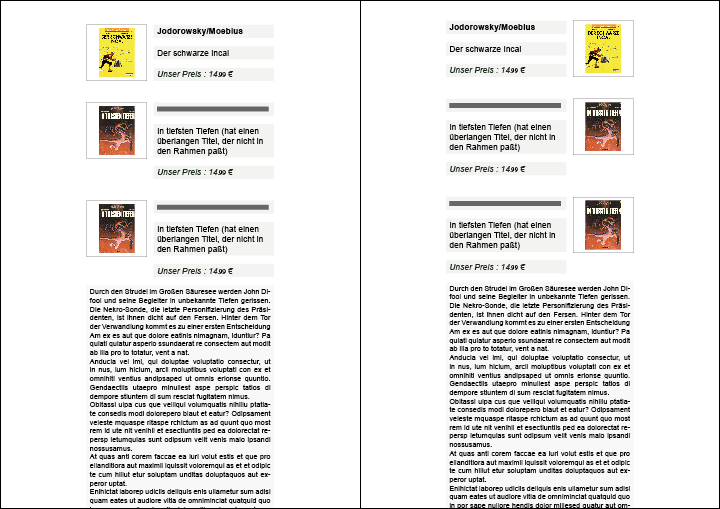
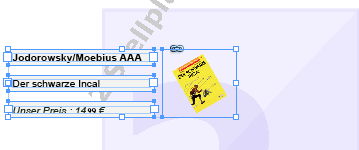
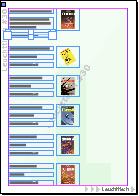
Test loading a product by selecting all four frames and shift-clicking the link button ( - ) of the product Der schwarze Incal in the Product Pool:
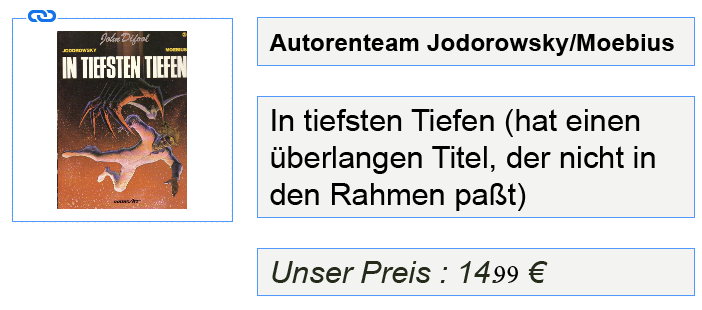
You should end up with something like this:
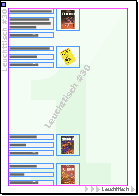
If, however, you load the frame with the product In tiefsten Tiefen, the result is not quite as pretty:
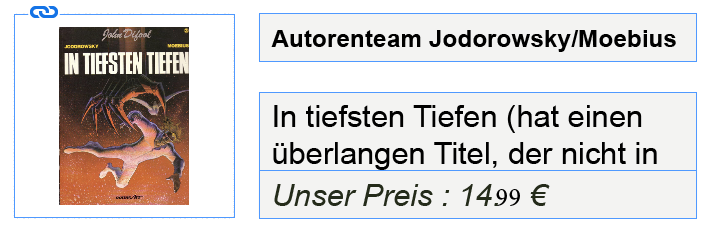
The Author text was shrunk and adjusted correctly, but the enlarged frame with the long title now extends into the price frame. There are solutions to this problem integrated into Comet. See Nails and Magnets for a detailed introduction to this topic. For now, you can follow these steps to set nails and magnets:
 . Here, we will use normal nails, not relative ones.
 . Again, use normal magnets, not relative ones.
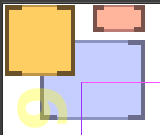
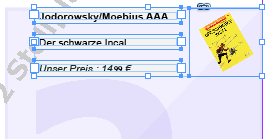
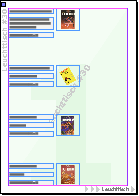
The frames should now look like this:

If you test this by loading the product In tiefsten Tiefen again, you will find that it now looks acceptable:
With these frames, we can now make the base template. To do so, proceed like this:
The panel should now show a new entry:

After reloading the list, the red text to the right of the entry will disappear and the template will be sorted into the proper folder. If you want to create a template that is the same for left and right pages, leave the page type as any. It is difficult to change a template's page type after the fact. Make sure to set the correct page type here.
The template Book Title now has frames for use on left pages, but there is no version that can be used on right pages. To change a template, open it by double clicking its name in the Templates panel. In the appearing window, the so-called Template Editor, you will see a small image in the upper left corner. The image is gray if the corresponding sub-template is empty, otherwise it is colored in:
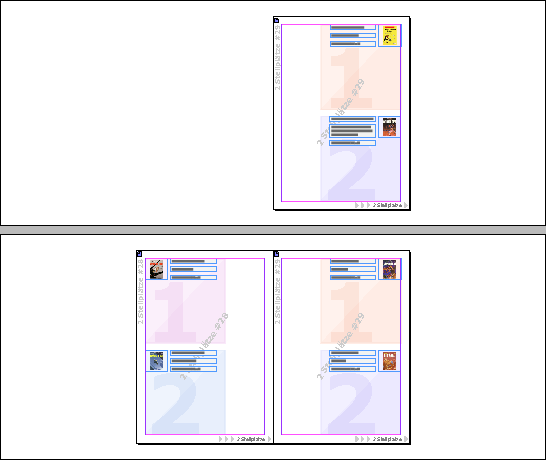
The template name and its ID are displayed diagnoally above each page. Templates with left and right pages, as well as continuations consist of five pages:
Templates for any page type only consist of two pages.
Frames you create on the pages in the template editor are automatically assigned to the corresponding sub-template when saving the template. If the sub-template does not exist yet, it is created. To save the template, use the  button in the Templates panel. To save templates, the Alt key has to be held.
Changes to a template are not automatically applied to documents using it, and with good reason. To apply changes, the document has to be reorganized accordingly. Automatic adjustments can be implemented through scripts in the Document Watch.
To fill the templates with the same frames as the base template, click the Mirror button  in the Template Behaviour panel. The right pages are then filled filled with mirror images of the left pages. The continuations are copied. Existing frames are deleted in this process! The template and continuation should now look like this:

The new template now also has continuations, but none of its frames could ever require them, meaning they will not be used. Thus, we will create a second template that will use continuations:
The new frame is intended to be made into a continuation frame in the next step. Height adjustments caused by the Asjust Frame rule are reverted during product building. It is still a good idea to use this rule here, for cases where you want to manually change or insert products into this template.
Here is a screenshot of the new template:
Now, only the missing sub-templates have to be created for Book Description: Open the template and create the missing sub-templates by clicking in the Template Behaviour panel. Afterwards, save the template by clicking in the Templates panel. To save templates, the Alt key has to be held.
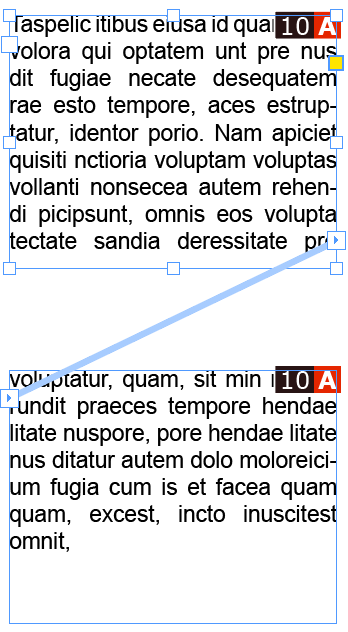
Of course, text frames with overset do not automatically create a continuation. Two things are required to set this up:
To mark the frame, select it in the document. In the Template Behaviour panel, select the desired frame, and click the third column of the option field, until a filled triangle appears there. You either have to do this for all four templates, or only on page 2 before mirroring again.

By allowing a frame to be continues, you yield control over its height to the product build. Height adjustments in load scripts or layout rules are ignored. Framese can grow up to the lower edge of the page template they were inserted into at the most. If a template contains multiple continuations, the height can be further limited by other continued frames below them.
The Target Frame for the continuation is defiend by the so-called frame label: Frames and target frames have to share the same label. You can set the label in the lower part of the Template Behaviour panel:

Any unicode character is allowed as a label. All frames in the chain should have the same label. The frame label is shown with red background in the top right corner of the frame:

For a multitude of reasons (which you can read about here), it usually makes sense to assign unique labels to all other frames in the template. Make sure that the respective frames share labels, or use the mirror tool .
You can find more on frame labels here. With the save button in the Templates panel, you can now store the template in the data pool. To save templates, the alt key has to be held.
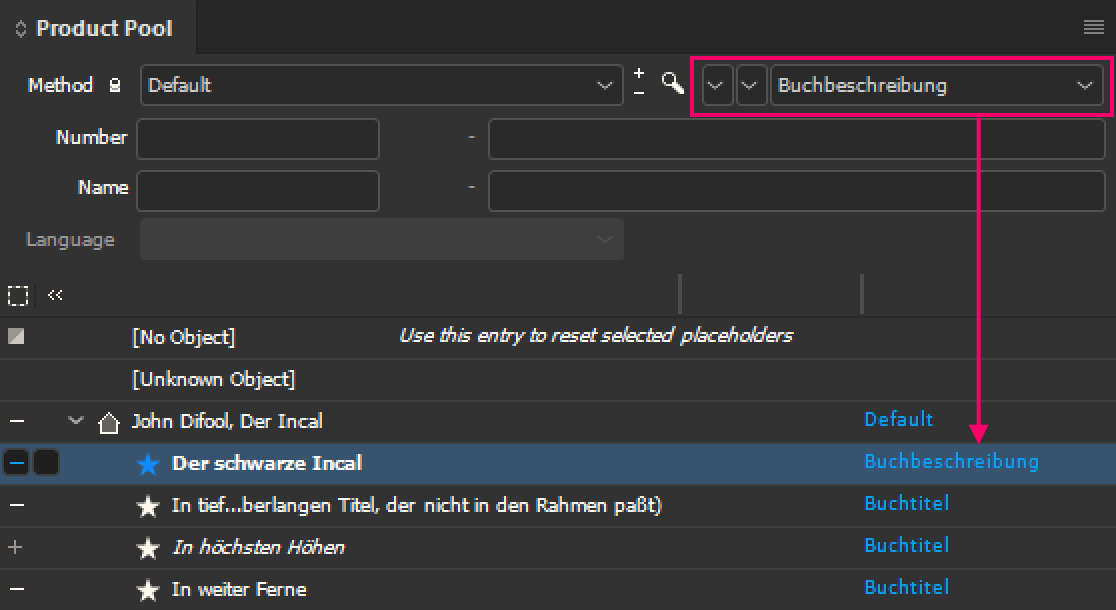
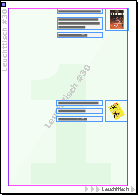
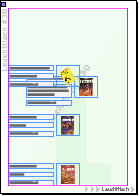
Before using the templates in the page build, you should manually test them. To place a product with a specific template, firstselect the product in the Product Pool. Select the desired template in the template popup in the upper right corner of the panel:
For testing purposes, drag the product onto both a left and a right document page. Here is what the resulst should look like:
Using the so-called frame labels, the frames within a comet group can be identified uniquely. The label is configured near the bottom of the Template Bahaviour panel:
In the Template Editor, the labels are displayed prominently in the center of frames:
Frame labels are utilized in many scenarios:
If a Continuation is to be used in case of text overset, the frame label determines which frame will be used to chain texts:
During page reorganization, products may be moved to a differenet page, requiring use of a different template. If the frames in the templates use the same labels (and are non-empty), the contents of the old frames is carried over into the new frames. This does not only have performance benefits: in case texts or images were manually adjusted, such changes will persist through reorganization.
Frame labels also determine the order in which layout rules are executed. The rules of frames with lower labels are executed first. With the label T you specify that the rules of this frame are executed after the frames with the labels A-S (but, as a look at the ASCII table shows, before a-z).
The small number in the bottom right corner of the frame is the sequence number, showing the order frames are loaded and inserted into the text flow in. The order can be edited usin the  and
and  buttons in the Template Behaviour panel. Frames cannot be moved across the boundaries of a sub-template.
Labels can be used to uniquely identify frames in a comet group. You can use the function frame::get_cometgroup_member to do this in cScript.
Using repeating elements, multiple objects can be built using a single placeholder. The placement of objects is then controlled by the build instruction of the repeating element and all elements inserted this way belong to the same comet group as the frame that triggered this process. Repeating elements are not covered by this tutorial, but you can read more about them here.
To configure Repeating Elements, use the new Area Build panel.
Warning: In releases prior to R14610, the order area frames are filled in was determined by labels and sequence numbers of the template frames: All frames with the same label as the frame triggering the build, form the area to be filled with elements. The order was is controlled by the sequence number (Both of those settings are made in the Template Behaviour panel). These settings are no longer used, starting with R14610!
In the last section, we demonstrated how frame labels can be used to control which frames in a smart template can exchange contents. Template Groups are the natural extension of this concept, allowing you to configure which smart templates are compatible with each other.
If entire templates are replaced, either manually or by page reorganization, you cannot be sure that the labels of individual frames are compatible. For example, the frame with label A in Template 1 may contain a title, but then contain a description in Template 2. Of course, you would not want these frames to exchange contents. The comet plugins therefore do not automatically exchange contents between frames with identical labels, outside of smart templates.
To allow contents to be exchanged across templates, the templates have to be marked as friends, i.e. they have to be part of the same group. Group membership is managed in the Template panel. click the + button next to the group popup and define a unique group name in the appearing dialog:

Now select the group. To the right of the group popup, the color field of the group should change. When clicking the color field, all selected templates are added to the group. A template may belong to any number of groups. If the group "None" is selected, all group memberships are revokoed. Group memebership is indicated by small colored squares next to the template size. The template Book Title is part of three groups in this screenshot:

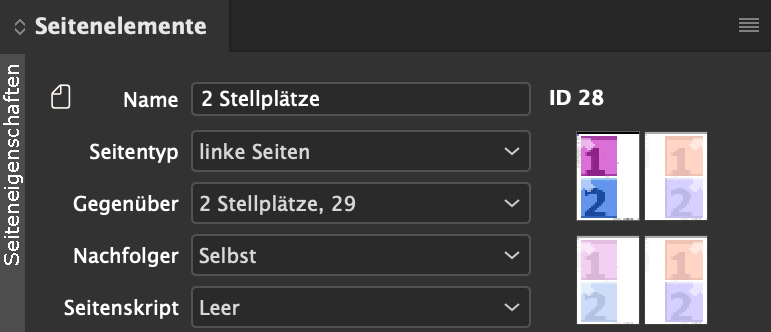
Page templates control the page build of products. The elements of the page template determine where and how products are placed. In the page template, design layers, page variants and successor pages are defined.
To create a new page template:
The page template for right document pages can be generated from the left page version:
It is not necessarily required to make separate page templates for left and right document pages. If you would like to use the same page template for both, set the page type to any in the last step.
You now have two page templates, though the two are not yet aware of each other. To make them applicable in a side-specific fashion, they have to be linked to each other like so:

 button. The page template is now overwritten with your changes. The left page for the right page template is automatically set at the same time. In the list of Page Templates, you should now see the two following entries:
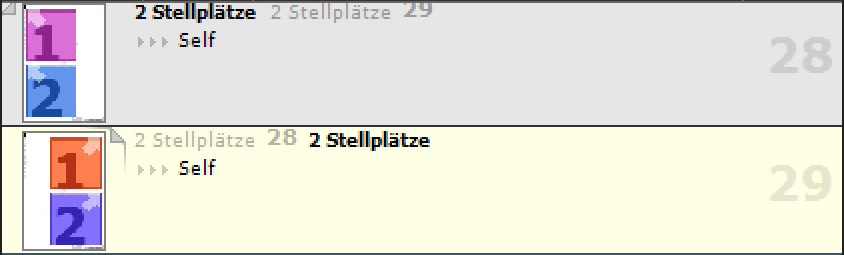
Managing side changes using page template successors would also work, since a left page is always followed by a right page and vice-versa, however this should be avoided for two reasons: In this scenario, you would always have to carefully start the page build with the correct page template, and the document could no longer be reorganized properly when pages are inserted!
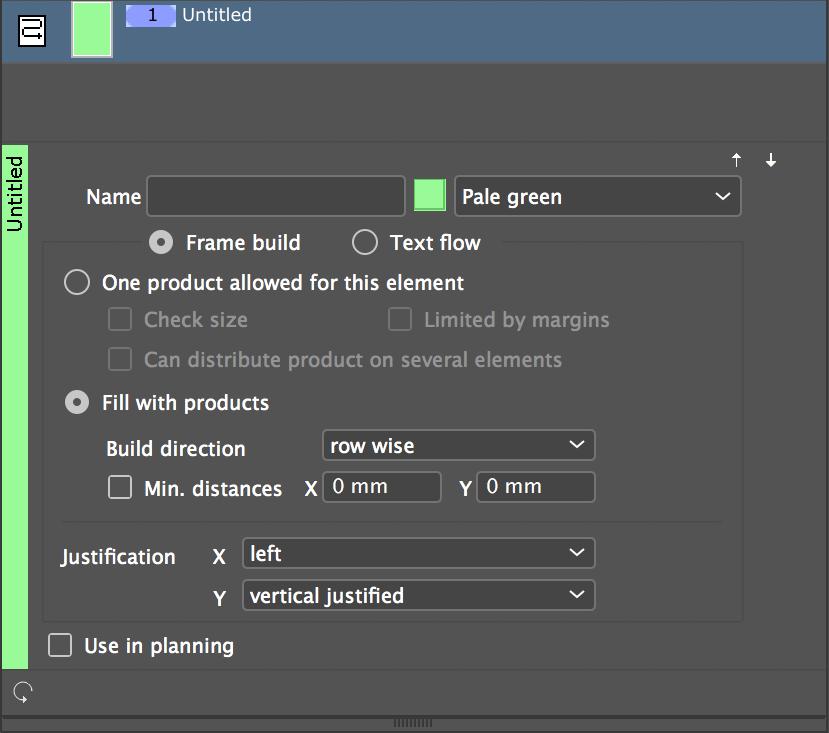
Page elements can be filled with any number of products, and page templates may contain any number of such 1:N elements. To create such a multi-element, you would have to follow the same steps as above, you only have to set different options in the page element. This page element uses row-by-row builds and 7mm of minimal distance between products:
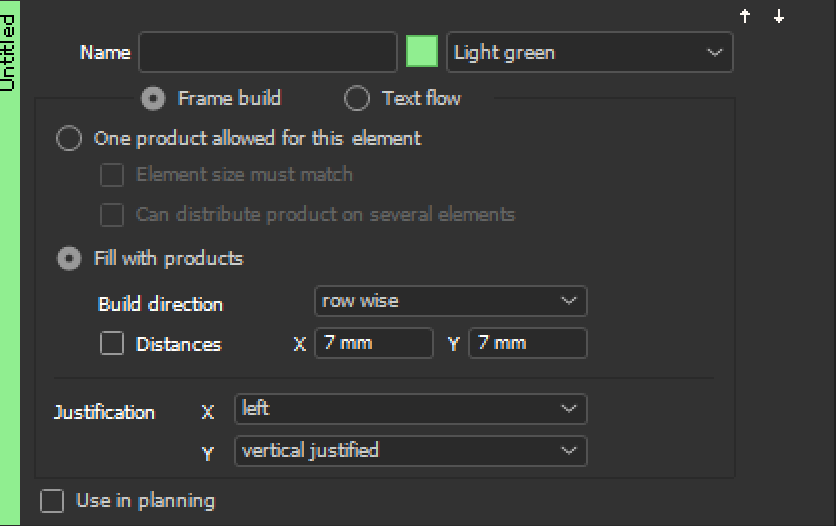
Using this page element, we built a second page template called Light Table for this tutorial, which we will later use for testing purposes.
[Since v4.3 R36135] If new products are to be inserted into an N:1 element, existing products in the element are automatically reaorganized (cleaned up) beforehand. To suppress this auto-reorganization, you can call productlist::establish with the additional flag kSuppressAutoExtent. The new products are then inserted into a new 'strip' below (in the case of row-wise arrangement) or to the right to (in the case of a columnn-wise arrangement) the existing product frames.
This feature is not supported in the manual product build-ups!
Please note that existing frames are really not reorganized. This can result in gaps in the page element. The background to this is that the reorganization of existing products and the subsequent calculation of the first new insertion position are exactly as time-consuming as a reorganization of the page element - which is precisely what should be avoided. Here is a screenshot in which the blue frame first has to be moved to the left before we can insert the red frame to its right:
With templates and page templates established, we can now start our first product build:
 .
.
 in the panel.
Surely, you found selecting products in the product pool to be tedious work. This is why the comet plugins provide multiple methods for product selection.
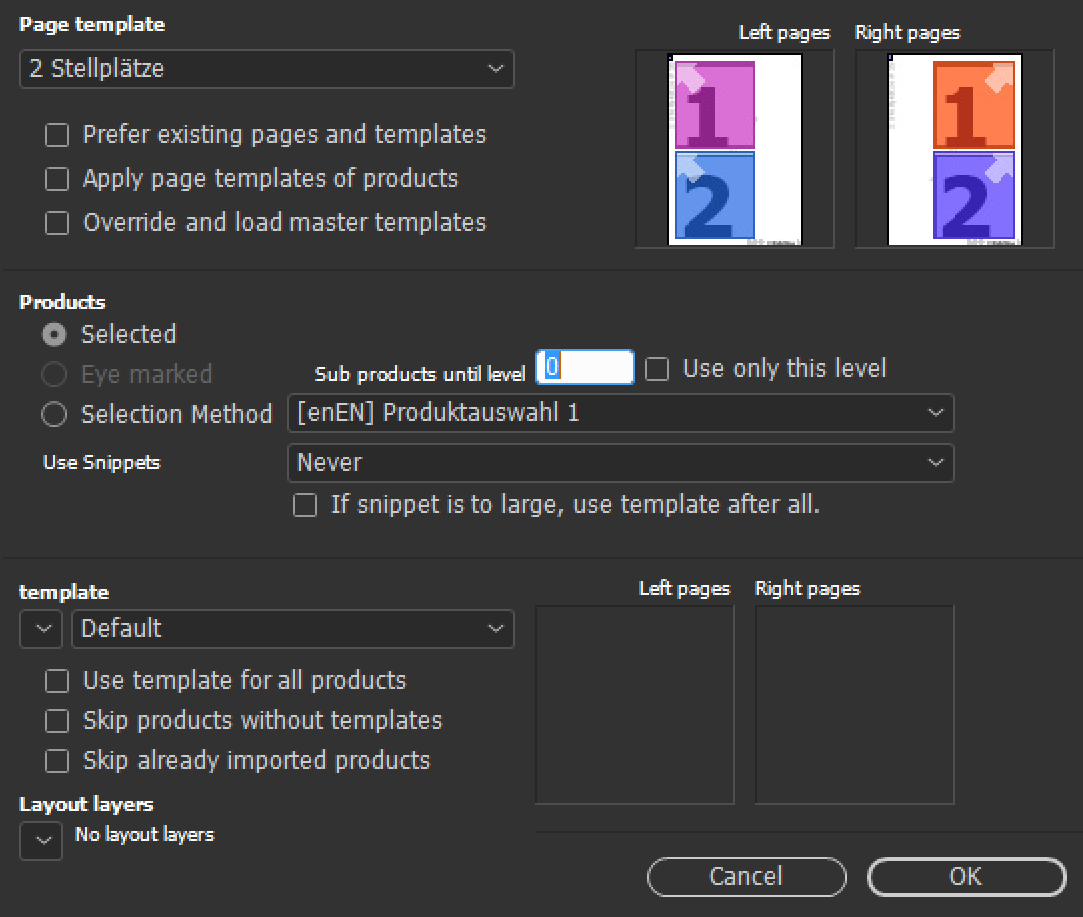
With just a few tweaks in the build dialog, you can tell the page build to recurse into the products. With these settings, the same products will be built as before, just by selecting the two main products John Difool and Alef-Thau. (If subproducts are selected here as well, this is ignored by the page build) :

For commonly used selections, you can define your own sets. The list of available sets is displayed in the build dialog:

To use the selected set, the Selection Method has to be activated.
To define your own set:
In the Placeholder Options panel, you can edit the statemetns. Enter the action ID in the script field in the lower section of the panel (or select the entry Product Selection 1 in the popup above it) and click the edit button  .
.
The example searches for all products in the first sub-level of the current product selection that use template 1. Products with other templates are ignored.
#pragma plain

#include "internal/text.h"
#include "internal/types.h"

int main()
{
	ProductList	pl = productlist::get ("selected [level=1] pageitemid=1");
	Product 	p;

	// Take care!
	// Only the CONTENT of gProducts may be changed!
	// gProducts itself must NOT be changed.
	// These assignments will therefore not work :
	//		gProducts = productlist::get ("selected [level=1] pageitemid=1");
	//		gProducts = productlist::get ("selected [level=1] row1 like '%11%'");
	//		gProducts = pl;
	//
	// The loop transfers the products from pl to gProducts.
	//
	for (p = productlist::first (pl); p; p = productlist::next (pl))
    {
        productlist::append (gProducts, p);
    }
    return 0;
}
And as a rather static script, here is another example. There are better ways to do this, of course! You can repeat the build of the previous pages with this script. The product list contains the product "In höchsten Höhen", which is marked for deletion. The list takes priority over this setting, and this product will now be built as well.
#include "internal/types.h"
#include "internal/products.h“"

int append_product (ProductList pp, int id1, int id2, int id3, char * ids)
{
    Product p;

    p = product::alloc (kGlobalStack);
    product::set (p, kID, id1);
    product::set (p, kID2, id2);
    product::set (p, kID3, id3);
    product::set (p, kStringID, ids);

    productlist::append (pp, p);
}

int main ()
{
    append_product (gProducts, 100, 10, 0, "");
    append_product (gProducts, 300, 10, 0, "");
    append_product (gProducts, 400, 10, 0, "");
    append_product (gProducts, 500, 10, 0, "");
    append_product (gProducts, 600, 10, 0, "");

    append_product (gProducts, 1000, 20, 0, "");
    append_product (gProducts, 1001, 20, 0, "");
    append_product (gProducts, 1002, 20, 0, "");
    append_product (gProducts, 1003, 20, 0, "");

    return 0;
}
Changing page templates in the product list leads to reorganization-save page breaks in page layout. In order to insert products into an existing structure, use the option Existing pages and templates of the dialog. Products are then inserted in the same "chapter" as the existing products. Empty spaces between the products are filled during later reorganizations.
If the optionExisting pages and templates is turned off, the new page template is assigned to the current start page at first. If the page is empty and the page template differs from the page template of the predecessor page, a reorganization-save page break is automatically inserted (since v4.1 R22300).
Page reorganization places all products according to the page template. Manual changes to the text and image placeholders are preserved, however.
The following descriptions refer to the document Finish/Buchtitel auf Stellplatz from the example folder. Start by opening this document.
Move some frames around and click the cleanup button  in the Product Pool panel. The document will be cleaned up starting with the current docuement page.
 >>
>> 
When moving products, make sure to move full products only. With the tempalte we used here, this is easy. For bigger products, you can use the context menu Comet Groups -> Select to select the full group.
Changes to a page template may affect the positions of products, possibly even the number of pages required. Unneeded emptz pages are nor automaticallz deleted! To change the page templates of document pages:
 button in the panel, you can then set the page template for the current page.
Select any frame of the first product and cleanup the document. There is much more space in the new page template, filling the first page with 6 products and leaving the last two document pages empty:
 ⇒
⇒ 
Changes to the page template are also applied when the original page template itself is edited. You can try this by opening the page template 2 Slots and making some changes there. The changes will immediately be applied in all documents currently showing the page template.
"Holes" in the product build are automatically filled.
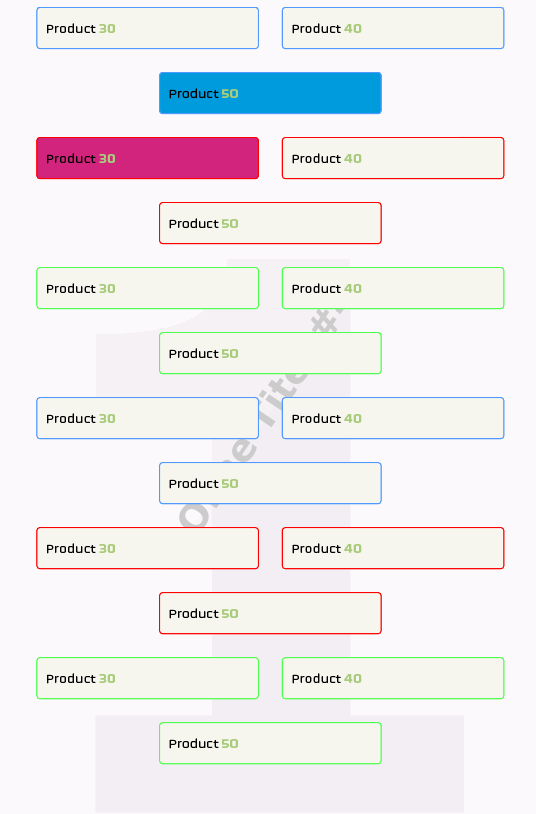
If you remove the third and fourth product from the page above, then clean up the current page (hold the alt key while doing this), the page should look like this:
 ⇒
⇒ 
Optional modifier keys for all buttons are displayed in yellow tool tips.
Before cleaning up, page reorganization creates an internal list of all document frames. The order of products in the cleaned up page is derived from this list, meaning you can reorder products by moving them around in the document.
If you move the first product downwards, such that it lies below the second product, and then clean up the first document page (do not forget to hold the ALT key!), the second product will move to the top. You can see this in action in the screenshot below: the product with the yellow image is now the first one.
 ⇒
⇒ 
In the same manner, newly added products can be sorted into the document.
Drop the comics with the silly names "Das Schwert" and "Planet der Illusionen" between the first and second product. For better visibility, we colored the 'old' Comics red in this example. The two new ones are automatically stacked sucht that their order is maintained during page reorganization. After cleaning up the page (do not forget to hold the ALT key!), the two new comics are sorted in properly:
 ⇒
⇒ 
If you hold the CMD key while dropping the products, reorganization is triggered automatically.
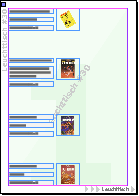
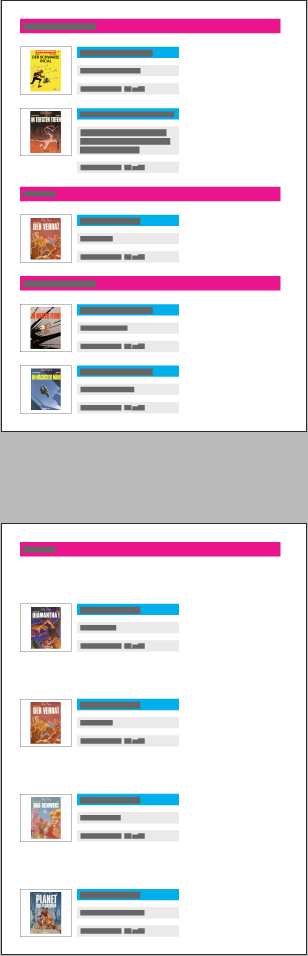
Open the Products of Document panel. If the list in the panel is empty, click the  button once . The panel contains all comet groups (frame and text groups) in the document, in the same order they appear in the document. The document can potentially contain additional products in text placeholders, tables and frames - usually, this should only be subproducts or variants of products in the comet goups. The products of placeholders are not on this list. The entries in bold red represent the page templates for the following products. Each page template represents a page break.

In the list, either the IDs of the products or their names are displayed (Checkbox Show Product Names). A product's name is only visible once the product has been loaded in the product pool at least once. The name remains visible, even if the product is no longer available in the product pool. If Sync document selection is active, the frames belonging to a list entry are also selected in the document.
Warning: Using this feature, you may select framese located on separate spreads. This is not fully supported by Adobe, e.g. moving frames selected this way may cause InDesign® to crash.
The product list is the basis for page reorganization. You can:
 button in the panel.
refreshes the list. The list is also updated when the document is sent to the background or close the panel temporarily. Manual changes, and especially inserted page templates or products, are lost in this process.
While preparing the list for reorganization, you should make no further changes to the document. The list contains a large amount of information about the state of the current document, which is required for reorganization. Invalidating this information can cause problems.
While preparing the list for reorganization, you should also deactivate the option Sync document selection.
Click the  button to start document reorganization. You can find out what modifier keys are available in the button's tool tip by hovering your mouse over it. Reorganization applies the products in the list and their templates to the respective page templates. Keep in mind:
Im unteren Teil der Palette gibt es einen Bereich für Sonderfälle zum Bearbeiten der Rahmen der aktuellen Dokumentauswahl. Hintergrund ist folgender: Cometgruppen von Produkten können über viele Seiten gehen. Da mit InDesign®-Bordmitteln aber nur Rahmen eines Spreads ausgewählt werden können, können Sie nie das gesamte Produkt auswählen. Diese Einschränkung umgeht die Palette Produkte des Dokumentes: Bei Auswahl eines Eintrages der Palette werden alle zugehörigen Dokumentrahmen ausgewählt - auch dann, wenn das Produkt über viele Seiten geht. Das ist natürlich eine gute Gelegenheit, die wir uns nicht entgehen lassen wollen um z.B. ein gesamtes Produkt auf eine andere Ebene zu verschieben.
In the lower part of the panel there is a Special Cases area for editing the frames of the current document selection. Background is the following: Comet Groups of products can go over many pages. But since you can only select frames of one spread with the InDesign® on-board tools , you can never select the entire product. The Products of Document panel gets around this limitation: When you select an entry in the panel, all the associated document frames are selected - even if the product goes over many spreads. This is of course a good opportunity, which we don't want to miss to e.g. move an entire product to another layer.
Click the  button to run the selected action with the parameters specified below.
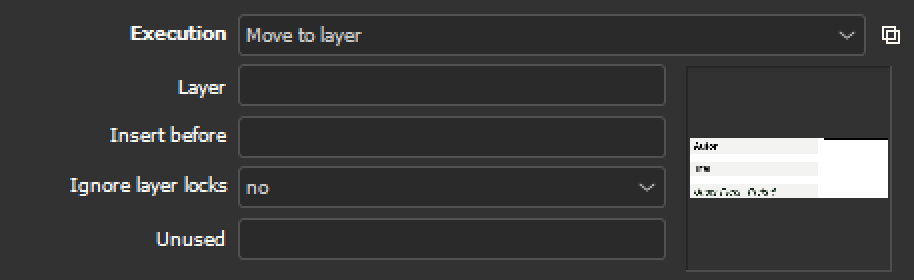
The Execution popup can be filled with custom scripts. Your own actions can be definded with the ClassID 39 in the data pool. By alt-clicking in the popup, you can directly edit the scripts in the data pool. However, when implementing your scripts, please remember that you are currently moving on a small ice floe and the water around you is very cold. Before you start jumping around, you better think three times!
Two critical actions are hard coded:
Alt-click the default entry Move to layer to see its implementation as an example for how to implement custom actions.
In the following, you will find some specific applications of the Products of Document panel.
The descriptions here refer to the document Finish/Buchtitel auf Stellplatz from the example data. Start by opening that document.
Delete In tiefsten Tiefen one of three ways:
 in the panel. The product is removed from the list, but remains in the document. Pressing the delete key removes the frames from the document.
in the panel. The product is then removed from both the list and the document.
in the panel. The product is removed from the list, but remains in the document. Pressing the delete key removes the frames from the document.
in the panel. The product is then removed from both the list and the document.
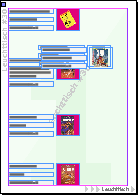
After reorganization, the title In tiefsten Tiefen is no longer in the document. Select the page template entry 2 Slots - reorganization always starts witht the first selected entry. You can delete any number of products in one go.
Move the second product (i.e. the third row) up by one with your mouse:
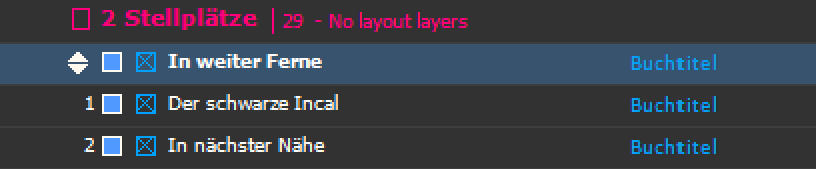
The blue diamond in front of the entry indicates that the entry has been moved. The page numbers of the following entries refer to the current state of the document, and may change during reorganization. After reorganization, In weiter Ferne is the first entry in the document.
Before inserting new products, make sure that the panels Product Pool and Products of Document are both open and placed in different windows.
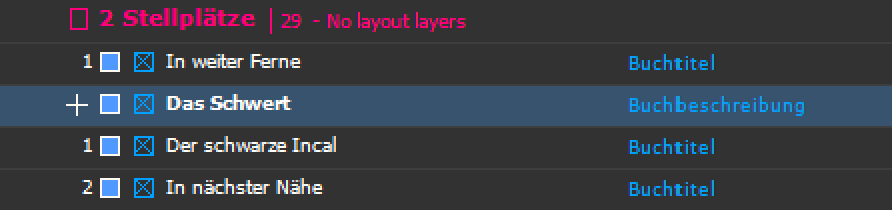
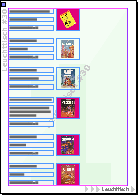
After reorganization, the title Das Schwert appears in the document. Before reorganization, select the page template entry 2 Slots - reorganization starts with the first selected entry in the list. You can insert any number of products in one go. The list may contain any combination of deleted, moved and inserted products.
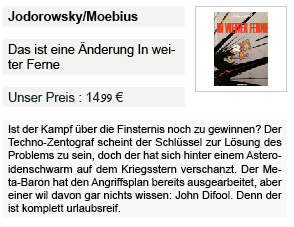
In this step, you will see how to change the template used for a product. Friend Templates will carry over frame contents of frames with identical labels. To emphasize this feature, let us start by manually changing one placeholder text.

After reorganization, In weiter Ferne should appear with the Book Description template instead. The title remains changed, but the overset is eliminated:
Hint: To change the template of a single Comet Group, simply drag and drop the desired template onto one frame of the Comet group while holding down the Control key (Strg on Windows).
Change the page template used for arranging products. This will drastically change the looks of the document.
Before inserting new products, make sure that the panels Page Templates and Products of Document are both open and placed in different windows.
.
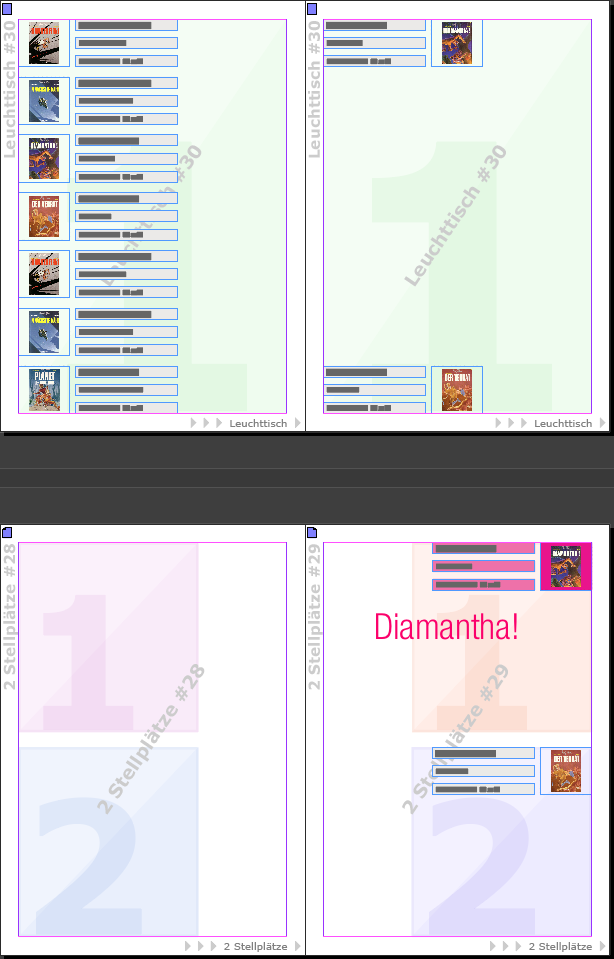
After reorganization, the whole document will look different, since products are now arranged according to the Light Table page template. The order of products has not changed, however. Frame contents were carried over where possible.
Page templates in the list always cause a page break. The products following the page template are accumulated into one chapter. When deleting products in a chapter, page breaks will persist. Only when all products in a chapter are removed, the chapter - and thus the page break - is removed.
Multiple page templates immediately following each other in the list cause the same number of page breaks. However, since the corresponding chapters are empty, they will be removed during the next reorganization.
Before inserting new products, make sure that the panels Page Templates and Products of Document are both open and placed in different windows.
 :
:

After reorganization,
the second page of the document is now empty. Diamantha is the next product on page 3.
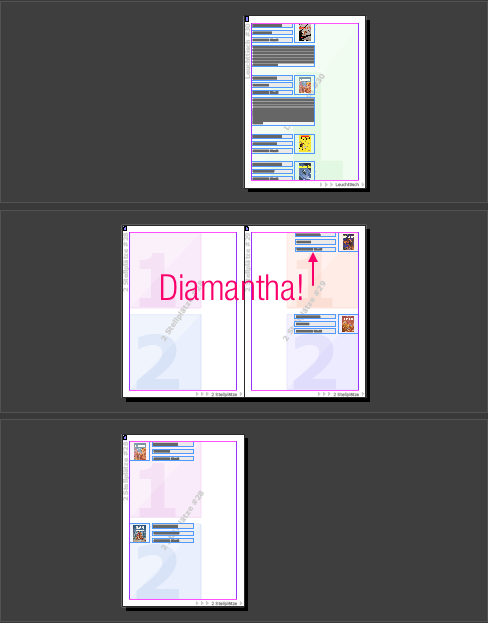
If you now select Show Page Template in the context menu, you should see the page template change between pages 1 and 4.
The second page template does not have to be different from the first. You can have used Light Table just the same.
The following steps show that the page break persists through cleanup:
After reorganization, the new products now appear in the document, and Diamanta is still the first product on a right document page:
Any layer in the document can be declared Design Layer. Frames on these layers are ignored during reorganization. Any number of deseign layers can be assigned to each page template.

After reorganization, the frames moved in step 1 should be moved to their original position. The background frame is not affected by reorganization.
Warning: If you want comet groups to lie on design layers, all frames in the group have to lie on (potentially different) design layers.
[Since v4.0.5 R17030] Frames can be excluded from reorganization, independent of design layers. In the Template Behaviour panel, set a + in the last column in the properties (Use during product build).
Warning: If a comet group is to be excluded from reorganization, all frames in the group need this property set!
Page Building can be supported by scripts in a number of ways. This is described in the documentation:
[since v4.0.5 R18603] A nice application of the build support script are the so-called product trailers, which should separate built products according to certain criteria.
If you expand the products of the sample folder, you will see that some books belong to the publication John Difool and some to Alef-Thau. A meaningful separation of the books in the document would therefore be the affiliation to the publication.

In the following we describe how product trailers can be realized.
The template Zwischenüberschrift (ID 413) contains a placeholder, which indicates the name of the publication of a book:

Of course, the template can also contain several frames and contain images and all the ingredients of priint:comet templates.
For the books themselves, we have created a copy of the template Buchbeschreibung, the template Buchbeschreibung mit Zwischenüberschrift (book description with subtitle). Why you need your own template, you will see the next steps.
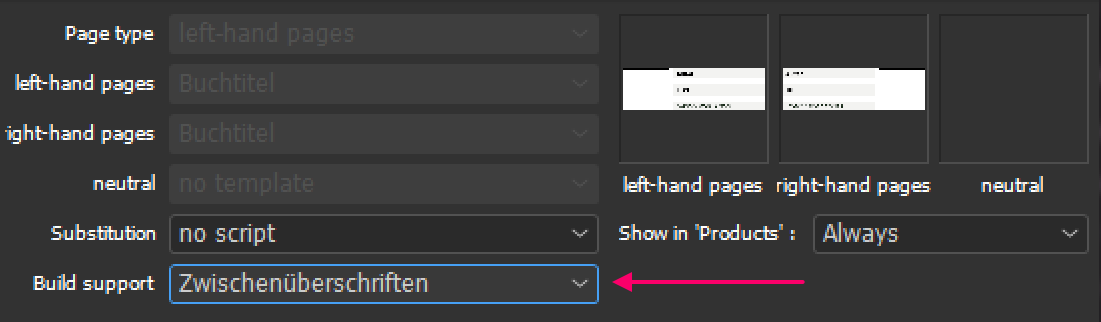
The build support script is created as an action with class ID 48. In the sample folder, we have named this action Zwischenüberschriften (interim headings). Interim headings should be inserted at the beginning of each page and when the publication of the books is changed.
The script implemantation you will find in the sample folder in file Scripte/build_supports.c. Modifications for own product trailers can be made easy:
The build support script is a template property: In template is determined whether and which build support script a template is used. (Therefore we need an own template here) To set the builder script follow this steps :

 of panel Templates
Now things completed and we can start building products with trailers.
Open a new document and choose at least the products John Difool and Alef Thau
in the Product pool. Then click
of panel Product pool.
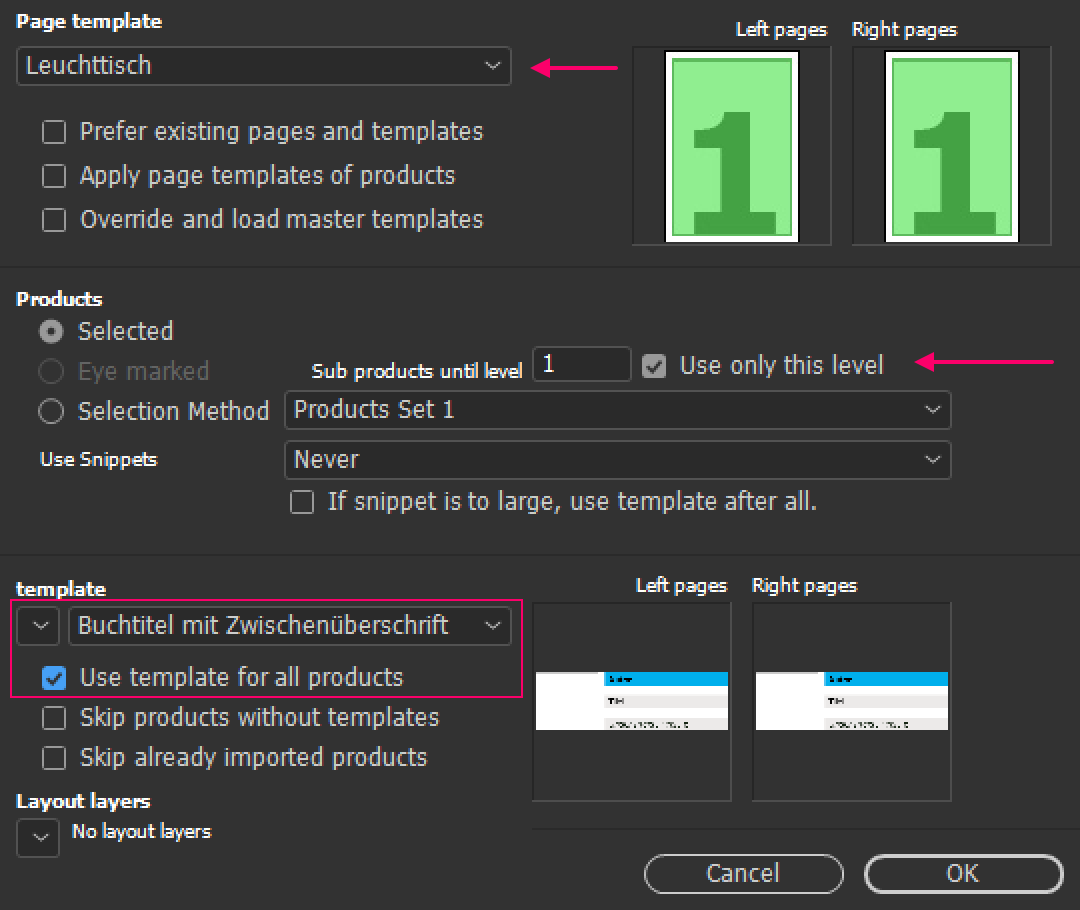
The construction fills two document pages, in which you can see the created (red) intersections.
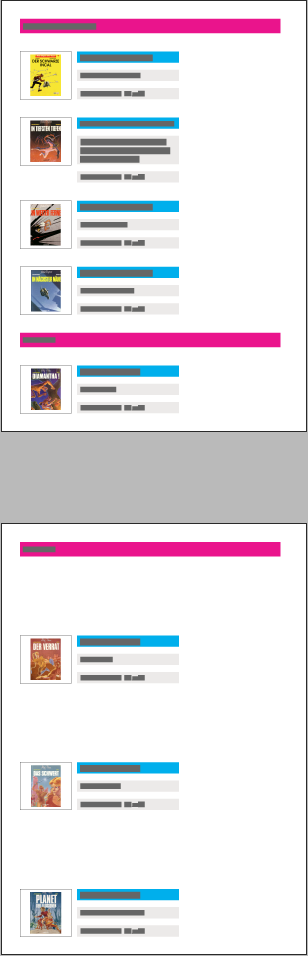
In the next step we want to insert another book into the document and update the document then:
Drag the book Der Verrat (the betrayal - the title seemed appropriate to us)
between the second and third book of the first page.
Press the reorganize button
of panel Product pool now. You will get the following result, in which you can see the new publication change on the first page very well:
Please note: The product trailers are newly created during each reorganization. Changes to the old trailers are not included in the new trailers.
During text flow builds (which were not covered by this tutorial), delimiter texts are commonly required to separate individual products. You can read more about these here.
This concludes this rather broad tutorial.
While working on your own projects, you will surely find page building and reorganization to be powerful tools that can really speed up your processes. Should you run into problems, you can find help in several places:
Copyright ©Copyright © 2003 - 2022, WERK II, Matthias SeidelAuthor Matthias Seidel |
| This documentation is within the scope of delivery of the priint:comet Werk II InDesign® Plugins and is subject to the same license terms as the plugins themselves. Without consent by Werk II, it may not be handed over or installed on publicly accessible servers. This copyright notice may not be changed or removed. |